Ubuntu 12.04 LTS "Precise Pangolin" is proving everyone wrong. It is perhaps the most loved Ubuntu release since "Lucid Lynx". Unity is now an almost-finished product. The rock solid nature of Ubuntu 12.04 LTS along with bold moves such as the introduction of features like HUD is winning the hearts and minds of geeks and normal-users alike. Here are the things you could do after installing Ubuntu 12.04 to make it an even more useful and finished OS.
Top Things To Do After Installing Ubuntu 12.04 Precise Pangolin
Update Repositories
Top Things To Do After Installing Ubuntu 12.04 Precise Pangolin
I know, it's late. Usually I come up with this post as and when a new major Ubuntu release happens, which has proved helpful to hundreds of thousands of newbie Ubuntu users to get things rolling in an otherwise alien world. Because of reasons you all know by now, I was not able do it this time around, till now. And since it's already late, I have decided to elaborate the article even further by including every bit of information I could collect regarding the things you could do in Ubuntu 12.04 LTS after installing. So here is it.
First Things First - Installing Restricted Extras During Installation- Starting from Ubuntu 11.04 release, you can install restricted codecs package (which include Adobe Flash, MP3 codecs and such) during installation of Ubuntu OS itself.
- Notice the arrows pointing to the boxes in the screenshot above. If you tick both of them during the Ubuntu installation process (make sure you are connected to the internet before doing so), restricted extras package will be installed automatically and you will be able to play mp3's, avi's, mp4's etc. and watch flash videos (YouTube videos for example) right after Ubuntu installation is done with.
- But there is a catch. If you have a slow internet connection (which is very rare these days), ticking the boxes shown in the screenshot above will unnecessarily lengthen the installation process. I for one prefer to do all that after installing Ubuntu. If you are like me, the next two steps are for you.
- After you install brand new Ubuntu 12.04, the first thing you need to do is to update repositories and make sure you have the latest updates installed (Like I said before, you need to do this only if you haven't ticked the boxes shown in the above screenshot).
- Search for Update Manager in Unity Dash and launch the Update Manager app. Check for updates available and install them if any.
- OR you can do this entirely using command line. Open Terminal (Ubuntu 12.04 Keyboard Shortcut: Ctrl + Alt + T) and copy-paste the following command into Terminal.
sudo apt-get update && sudo apt-get upgrade
- Done. Ubuntu repositories have been successfully updated.
- Install the "ubuntu-restricted-extras" package. This will enable your Ubuntu to play popular file formats like mp3, avi, flash videos etc. CLICK HERE (to install directly fromUbuntu Software Center) OR simply copy-paste the following command into Terminal to install the package (You need not do this if you have ticked the 'right' boxes before).
sudo apt-get install ubuntu-restricted-extras
- Done.
- Though installing the restricted extras package will solve most of your problems, you may not be able to play dual layer dvds yet in your Ubuntu. Most commercial DVDs are encrypted with CSS (the Content Scrambling System), which attempts to restrict the software that can play a DVD.
- For that, you need to install libdvdcss2 package from medibuntu repositories. Simply copy-paste the following commands into Terminal.
sudo wget --output-document=/etc/apt/sources.list.d/medibuntu.list http://www.medibuntu.org/sources.list.d/$(lsb_release -cs).list && sudo apt-get --quiet update && sudo apt-get --yes --quiet --allow-unauthenticated install medibuntu-keyring && sudo apt-get --quiet update
sudo apt-get install libdvdcss2
- Let the process complete, might take some time.
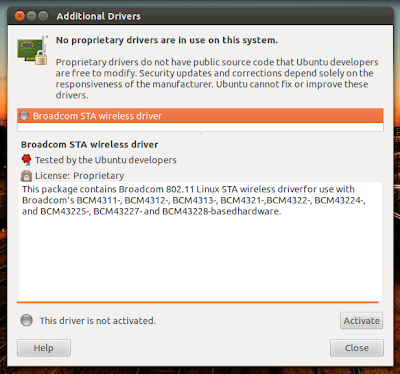
- In my case, all the hardware drivers including graphics, sound and wireless drivers were enabled automatically (though, as you can see, I still have a proprietary wireless driver on offer, which I have not activated). But this may not be the case for everyone.
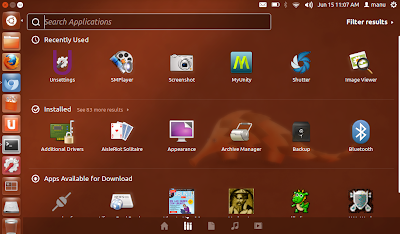
- If you are among the not-so-lucky, open Unity dash (Ubuntu 12.04 Keyboard Shortcut:Super key) and search for 'Additional Drivers' application.
- Check for additional drivers available and activate the ones you want. In 90% of the cases, this will do the trick. Those who were not able to get their hardware drivers enabled yet will have to do a fair amount of digging through ubuntuforums.
Enable 'Show Remaining Space Left' Option in Nautilus File Browser
- Status bar towards the bottom of the Nautilus window shows not only the amount of free space left in the drive but also the number of items in that particular drive/folder. This is a simple yet very useful feature. Do the following to enable it.
- Open Nautilus file browser. Go to View - Statusbar. Enable it and you're done.
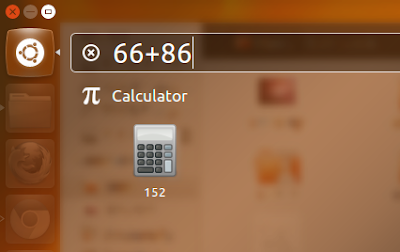
Calculator Lens/Scope for Ubuntu 12.04
- Calculator Lens/Scope for Unity Dash. Do the following to install it in Ubuntu 12.04.
sudo add-apt-repository ppa:scopes-packagers/ppa
sudo apt-get update
sudo apt-get install unity-lens-utilities unity-scope-calculator
- Done. Log out and log back in (OR hit Alt + F2, type unity --replace and press Enter) .
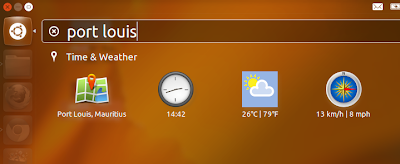
Unity Cities Lens/Scope for Ubuntu 12.04
- Unity Cities lens/scope for Ubuntu 12.04 is nifty. You just have to open up Dash and type in the city of your choice. It will show you the map, time, temperature and even the wind-speed right in your Unity Dash.
- And it is available in the same PPA as above (Calculator Lens). So if you have already installed Calculator Lens from scopes-packagers PPA, all you need to do is this:
sudo apt-get install unity-scope-cities
- Done. Log out and log back in.
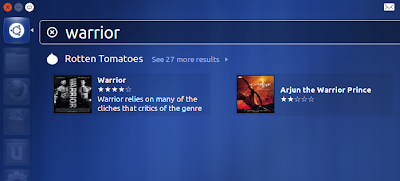
- If you are a movie buff like me, this one is for you. This particular Unity Lens allows you to search for movie reviews directly from Unity Dash.
- Only if this Lens/Scope could show data from IMDB.com as well.
- Again, it is available in the same PPA as above (Calculator Lens). So if you have already installed Calculator Lens from scopes-packagers PPA, do the following in Terminal (otherwise, you have to run the first two commands as above).
sudo apt-get install unity-scope-rottentomatoes
- Done. More Unity Lenses/Scopes can be found here.
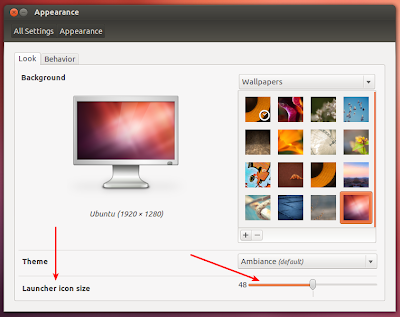
- No need for third-party apps to do very basic stuff like changing Launcher icon size, behavior etc. You can now do all of that directly from Appearance window.
- Right click on the desktop, select Change Desktop Background and Appearance window will pop up. You know what to do (see screenshot above).
Install MyUnity, Packed with Tons of Useful Ubuntu 12.04 Tweaks
- CLICK HERE to install MyUnity in Ubuntu 12.04 LTS.
- OR copy-paste the following into Terminal.
sudo apt-get install myunity
- Done.
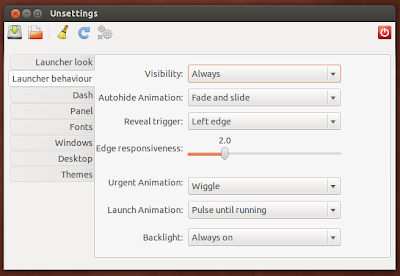
Install Unsettings, More Ubuntu 12.04 Tweaking Options, Simpler UI
- Unsettings is a newer application with similar tweaking options as MyUnity. More importantly, it has a useful 'Reset to Default' option.
- Though unlike MyUnity, it is not available in default Ubuntu repositories. Copy-paste the following commands into Terminal to install Unsettings in Ubuntu 12.04.
sudo add-apt-repository ppa:diesch/testing
sudo apt-get update
sudo apt-get install unsettings
- Done.
Ubuntu Tweak: The Most Comprehensive of Them All
- Ubuntu Tweak is undoubtedly the most comprehensive tweaking tool for Ubuntu.
- Apart from the usual Unity related tweaks, Ubuntu Tweak has a number of other options like a fully functioning Software Center, huge array of scripts to choose from, Computer Janitor to free up space etc. to name a few.
- Do the following in Terminal to install Ubuntu Tweak.
sudo add-apt-repository ppa:tualatrix/ppa
sudo apt-get update
sudo apt-get install ubuntu-tweak
- Done.
Install Open in Terminal Nautilus Extension
- This extension adds a very useful 'open in Terminal' option to Nautilus right click menu.
- CLICK HERE to install extension directly from Ubuntu Software Center.
- Log out and log back in to enable it (OR hit Alt + F2, type nautilus -q and press ENTER).
- And you're done.
- I like my Unity's top panel to be semi-transparent.
- In MyUnity, just goto Panel settings to change its transparency.
- As you can see, there is also a 'Transparency maximized toggle' option. When it is set to ON, Panel transparency will be OFF for maximized windows. Very nice hack.
Enable Workspace Screen Edge Actions
- This is one of my favorite features which can be enabled/modified easily using Ubuntu Tweak. What it does is, you can set each corner of your workspace to do different tasks (which you can choose) on mouse hover action.
- Launch Ubuntu Tweak. Goto Tweaks - Workspace.
Install Weather Indicator Applet
- CLICK HERE to install Weather Indicator Applet in Ubuntu 12.04 LTS.
- After installation, search for weather indicator in Unity Dash and launch the Applet.
Install CPU/Memory Indicator Applet
- Useful CPU/Memory load indicator applet that will reside in your top panel.
sudo add-apt-repository ppa:indicator-multiload/stable-daily
sudo apt-get update
sudo apt-get install indicator-multiload
- After installing, just search for System Load Indicator in Unity Dash and launch the app.
Install Dropbox Client in Ubuntu 12.04
- Apart from Ubuntu One, Dropbox is my favorite cloud storage service. Interface is slick and Dropbox has perhaps the best Linux support among other popular alternatives.
- Simple double click on the downloaded .DEB package to install it.
- Afterwards, open Dash, search for Dropbox and launch the app. The daemon will take you through the installation steps further. More screenshots and details.
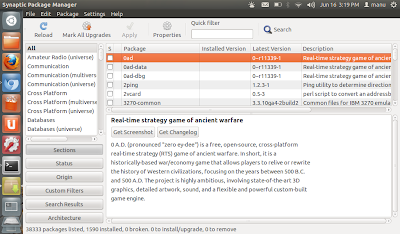
Install Synaptic Package Manager
- With all its bling-bling, Ubuntu Software Center is not a finished product yet. It is still very slow to respond, crashes every now and then and cannot match the functionality aspects of Synaptic Package Manager.










No comments:
Post a Comment